Retiring a server is not just pulling it from the rack. Miss a step and you risk a data breach, a failed audit, or thousands of dollars in recoverable value sent to a scrap bin. Here is the full server decommissioning process, from planning to certified disposition.

A server decommission checklist exists for one reason: a retired server is still a live risk until every step is closed out. The drives still hold data. The asset still carries value. The record still needs updating for compliance. Skip the structure and those loose ends turn into breach exposure, license waste, and equipment that walks out the door untracked.
This guide breaks the server decommissioning process into five phases and shows you exactly how to decommission a server, whether it is a single end-of-life box in a closet or a full row in a data center. Each phase comes with a copy-ready checklist, and the whole process maps to the security and environmental standards auditors actually ask about.
The five phases of the server decommissioning process
- Plan: inventory and dependencies
- Migrate: back up and move data
- Destroy: sanitize to NIST 800-88
- Remove: power down and unrack
- Dispose: certified ITAD and value recovery
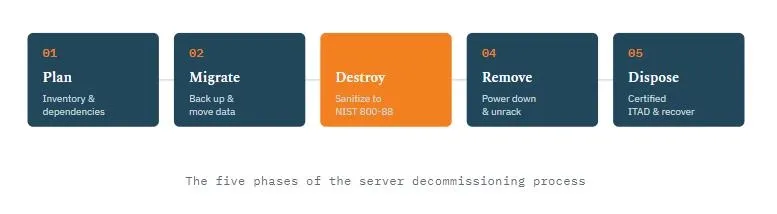
The server decommission plan at a glance
Before diving into the detailed checklists, here is the full server retirement project mapped out. Durations are typical for a single production server; a full site runs longer but follows the same sequence.
| Phase | What happens | Typical duration | Owner |
|---|---|---|---|
| 1. Plan | Inventory, dependency mapping, compliance review, approvals | 1 to 2 weeks | IT ops / system owner |
| 2. Migrate | Final backup, workload migration, cooling-off window | 1 to 4 weeks | Infrastructure team |
| 3. Destroy | NIST 800-88 data sanitization, certificates of destruction | 1 to 3 days | Security / ITAD partner |
| 4. Remove | Power-down, unracking, resource reclamation | 1 to 2 days | Data center ops |
| 5. Dispose | Chain of custody, remarketing or recycling, settlement | 1 to 2 weeks | ITAD partner |
Phase 1: Plan and document the decommission
Every clean decommission starts on paper, not in the rack. Before you touch a power cable, you need to know exactly what the server does, what depends on it, and who signs off on its retirement. This is the phase that prevents the 2 a.m. call when a "dead" server turns out to be running a payroll job.
- Confirm the server is a genuine retirement candidate and record the business reason (refresh, cloud migration, consolidation, or server end of life).
- Capture full inventory: make, model, serial, asset tag, rack location, and installed drives.
- Map dependencies: applications, databases, services, DNS entries, load balancer members, and scheduled jobs that touch the server.
- Identify and notify every stakeholder and application owner, with a defined shutdown date.
- Review compliance obligations that apply to the data on the system (HIPAA, PCI DSS, SOX, GDPR, or contractual retention rules).
- Log all licenses, warranties, and support contracts tied to the hardware so they can be reclaimed or cancelled.
- Get written approval to proceed from the system owner and, where required, security or compliance.
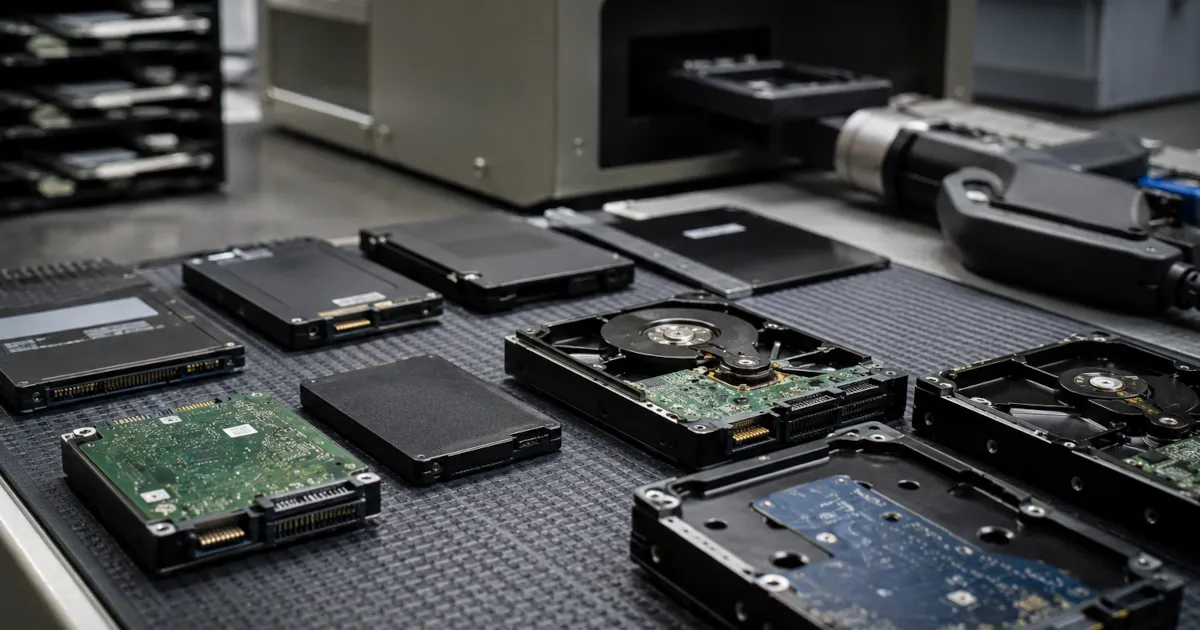
If the retirement is part of a larger move off premises, fold this checklist into your broader IT asset management plan for cloud migration so decommissioning waves line up with workload cutover dates instead of trailing months behind them.
Phase 2: Migrate and back up the data
Once ownership and dependencies are documented, protect the data before anything is switched off. The goal is a verified copy of everything you might need and a clean cutover for anything still in use.
- Take a final full backup and verify it restores. An untested backup is not a backup.
- Migrate any active workloads, data, or services to their new home and confirm they run there.
- Preserve any data under a legal hold or retention requirement in an approved archive.
- Repoint DNS, firewall rules, monitoring, and integrations away from the retiring server.
- Run the server in an isolated or powered-off "cooling off" state for an agreed window to confirm nothing breaks.
Phase 3: Securely destroy the data
This is the phase that keeps CISOs awake, and the one most home-grown checklists get wrong. A formatted or "deleted" drive is trivially recoverable. To retire a server safely you have to sanitize every storage device to a recognized standard, then prove you did it. The difference between data erasure and data destruction matters here: erasure leaves the drive usable and resellable, destruction does not.
NIST 800-88 data sanitization methods compared
| Method | How it works | Best for | Drive reusable? |
|---|---|---|---|
| Clear | Software-based overwrite of all addressable storage locations | Lower-sensitivity data; drives staying inside the organization | Yes |
| Purge | Cryptographic erase or firmware-level secure erase | Sensitive data; drives headed for resale or remarketing | Yes |
| Destroy | Physical shredding, disintegration, or degaussing | Highest-sensitivity data; failed or end-of-life drives | No |
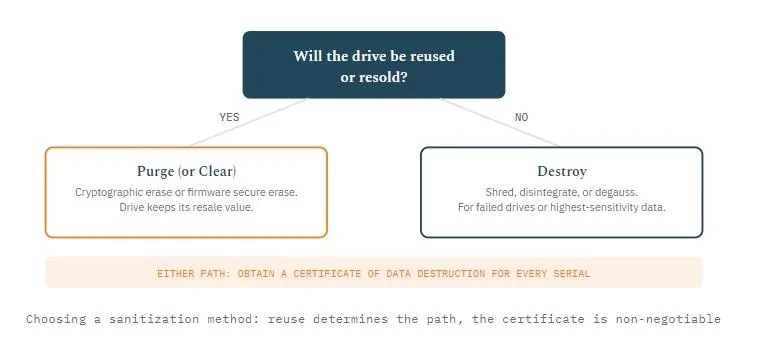
- Choose a sanitization method per drive based on data sensitivity and reuse plan: overwrite or crypto-erase for drives you will remarket, physical destruction for drives you will not.
- Sanitize all storage, not just the OS drive: data drives, cache, RAID members, boot media, and any embedded flash.
- Clear device configuration and credentials from BIOS, BMC, iDRAC, iLO, and management controllers.
- Obtain a certificate of data destruction for each device or serial, tied to the sanitization method used.
- Retain destruction records with your audit trail for the period your compliance framework requires.
Going deeper: Sanitization method selection, verification, and documentation are covered in detail in our guide to data destruction and data erasure for data center hardware, or see ReluTech's certified data destruction services for NIST 800-88 compliant processing with a certificate for every drive.
Phase 4: Physically decommission the hardware
With data handled, the physical work is straightforward as long as it is sequenced and labeled. Rushing this step is how a still-live neighbor gets unplugged by mistake.
- Power down gracefully following the correct shutdown order for clustered or dependent systems.
- Disconnect and label every cable: power, network, fiber, KVM, and management.
- Remove the server from the rack and update the rack elevation diagram.
- Reclaim freed resources: rack units, power circuits, switch ports, IP addresses, and cooling capacity.
- Tag the physical asset for its disposition route and stage it in a secured area, never an open hallway or loading dock.
Phase 5: Dispose of the asset and recover value
The final phase is where a decommission either closes cleanly or leaves a liability. A structured IT asset disposition process means the hardware is tracked from the moment it leaves your floor, disposed of in line with environmental law, and, where possible, turned back into cash instead of e-waste.
- Route the asset through an R2v3 certified ITAD provider so recycling and downstream handling are audited and compliant. Not sure what the certifications mean? Start with our breakdown of R2, e-Stewards, and NAID certifications.
- Maintain an unbroken chain of custody from your facility to final disposition.
- Remarket or resell hardware with remaining useful life through a hardware buyback program to recover value rather than paying to scrap it.
- Recycle non-reusable equipment responsibly, with documentation confirming no landfill disposal.
- Collect a certificate of recycling or a settlement statement for resold assets.
Often overlooked: Aging servers, drives, memory, and networking gear frequently hold real resale value, especially enterprise equipment three to seven years old. Sending a full refresh straight to the shredder can mean writing off hardware that a buyback or remarketing program would have turned into budget for your next build, or into funding for your cloud migration.
Close out the records
A server is not truly decommissioned until your systems of record say so. Closing the loop keeps your asset data trustworthy and stops "ghost" servers from haunting future audits, license true-ups, and security scans.
- Update the CMDB or asset register to mark the server retired, with disposition details and dates.
- Cancel or reassign support contracts, warranties, and maintenance agreements.
- Reclaim and reallocate software licenses freed by the retirement.
- Remove the server from monitoring, patching, backup, and configuration management systems.
- File the full record set: approvals, destruction certificates, chain of custody, and disposition confirmations.
Scaling to a data center decommissioning checklist
A data center decommissioning checklist is the single-server process repeated at scale, with facility-level coordination layered on top. The five phases still apply, but the risk and the value both multiply, so planning and logistics carry far more weight. Full-site projects, from de-installation and packing through transport and disposition, are exactly what data center decommissioning services exist to absorb.
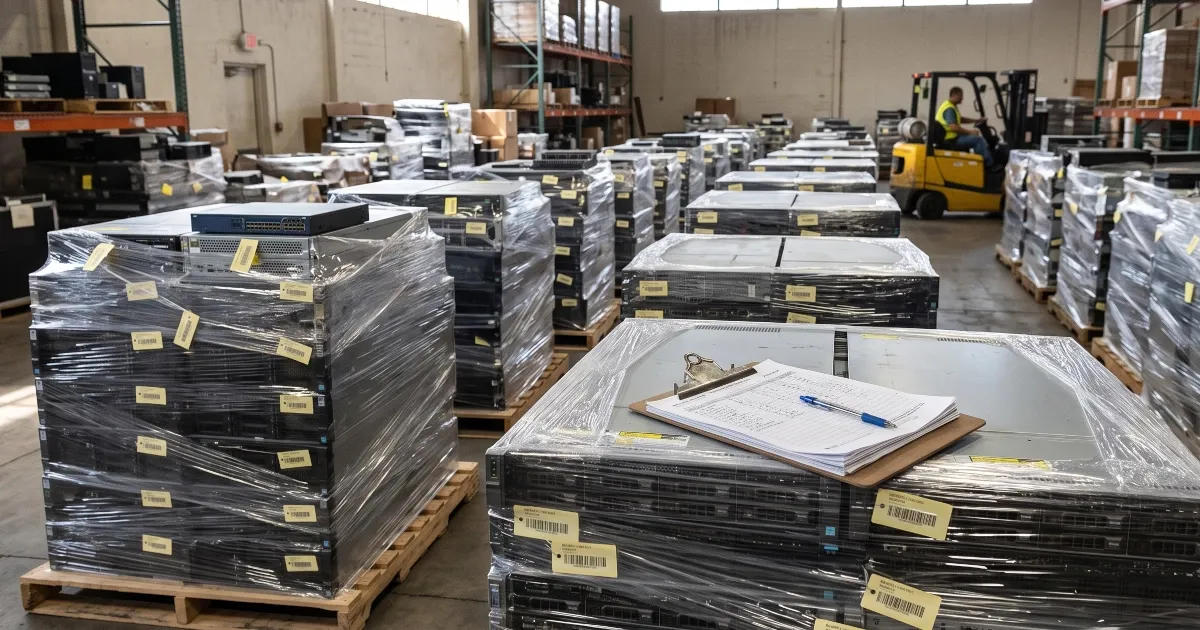
- Build a complete, verified asset register for the entire site before anything moves.
- Map dependencies across racks, rows, and applications so power-down sequencing does not cascade an outage.
- Coordinate secure logistics: packing, transport, and staging for large volumes of equipment.
- Handle facility items alongside IT gear: PDUs, cabling, UPS units, and structured cabling.
- Recover value across the full estate through bulk remarketing, and document environmental compliance for every asset.
- Obtain site-level sign-off from facilities, security, and compliance before closing the project.
For a deeper look at how disposition works at data center scale, including assessment, de-installation, and resale, read our guide to ITAD for the data center.
Decommissioning vs. disposal vs. ITAD
Three terms that get used interchangeably, and should not be.
| Term | What it covers | Where it fits |
|---|---|---|
| Decommissioning | The full retirement process: planning, data handling, sanitization, and physical removal | Phases 1 through 4 of this checklist |
| Disposal | What happens to the physical asset after removal: recycling, resale, or destruction | Phase 5 only |
| ITAD | The managed discipline of disposal: chain of custody, certified data destruction, remarketing, compliant recycling, and documentation | Phase 5, done properly and provably |
Server decommissioning best practices
The checklist covers a single retirement. These server decommissioning best practices keep the process healthy as an ongoing program:
- Batch retirements into waves. Decommissioning servers in planned groups cuts per-unit logistics cost and makes remarketing lots more valuable than one-off shipments.
- Do not warehouse retired gear. Hardware resale value declines every quarter equipment sits in storage, and stored drives are an unmanaged data risk. Move from unrack to disposition quickly.
- Standardize the paperwork. Use the same approval form, destruction certificate format, and CMDB close-out fields for every retirement so audits sample cleanly.
- Tie decommissioning to migration planning. If workloads are moving to the cloud, schedule hardware retirement waves against the migration plan, and use buyback proceeds to offset migration cost rather than letting idle gear burn maintenance budget.
- Audit your ITAD partner, not just your process. Verify certifications, downstream vendors, and reporting before the first pallet ships.
Common mistakes to avoid
- Wiping only the OS drive and forgetting cache, RAID members, or management controllers.
- Treating a quick format as data destruction. It is not.
- Losing chain of custody once hardware leaves the building.
- Skipping the certificate of destruction, then being unable to prove compliance at audit.
- Scrapping hardware that still carries meaningful resale value.
- Never updating the CMDB, leaving phantom assets in every future report.
Frequently asked questions
What is a server decommission checklist?
A server decommission checklist is a structured list of steps that takes a server safely from live production to retirement. It covers planning and inventory, data backup and migration, secure data destruction, physical removal, and certified asset disposition, so nothing is skipped and the process stays compliant and auditable.
What are the steps to decommission a server?
The server decommissioning process has five phases: plan and document the server and its dependencies, migrate and back up data, securely destroy the remaining data to NIST 800-88 standards, physically power down and remove the hardware, and dispose of the asset through a certified ITAD partner with a full chain of custody.
How long does it take to decommission a server?
A single server typically takes two to six weeks end to end, with most of that time spent in planning, dependency mapping, and the post-migration cooling-off window. The physical work of sanitizing, unracking, and shipping usually takes only days. Full data center decommissioning projects run from several weeks to several months depending on asset volume.
What is the difference between decommissioning and disposal?
Decommissioning is the full process of retiring a server from service, including planning, data handling, and hardware removal. Disposal is only the final step, what happens to the physical asset afterward. Responsible disposal means recycling or remarketing through a certified partner rather than sending equipment to landfill.
How do you securely wipe a server before decommissioning?
Use a sanitization method that matches your data sensitivity and follows NIST 800-88 guidelines: software overwrite (clear), cryptographic erase, or firmware-level purge for reusable drives, and physical destruction such as shredding or degaussing for drives that will not be reused. Always obtain a certificate of data destruction for your audit trail.
Can you sell decommissioned servers?
Yes. Servers, sanitized drives, memory, CPUs, and networking equipment frequently retain meaningful resale value, especially enterprise gear three to seven years old. A hardware buyback or remarketing program through a certified ITAD provider converts retired equipment into cash, which many organizations use to offset new infrastructure or cloud migration costs.
What should a data center decommissioning checklist include?
A data center decommissioning checklist scales the single-server process to a full site. It adds facility-level items: a complete asset register, dependency mapping across racks and applications, coordinated power-down sequencing, environmental and regulatory sign-off, secure logistics, chain of custody for every asset, and value recovery through remarketing of reusable hardware.
Related reading
- Everything you need to know about ITAD: data center edition
- Navigating data destruction and data erasure for data center hardware
- Understanding ITAD certifications: R2, e-Stewards, and NAID
- Adapting your IT asset management lifecycle for cloud migrations
Decommissioning at scale? Bring in a certified partner.
ReluTech runs the back half of this checklist for IT teams every day: R2v3 certified ITAD, certified data destruction with full chain of custody, responsible recycling, and hardware buyback that turns retired equipment into budget for your next build. Reduce data center cost today, fund the cloud tomorrow.